- Remove:
Upper Fairing Assembly (see Upper Fairing Assembly
Removal in the Frame chapter)
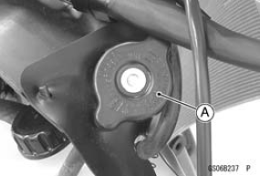
Radiator Cap [A] - Remove the radiator cap in two steps. First turn the cap counterclockwise to the first stop. Then push and turn it further in the same direction and remove the cap.
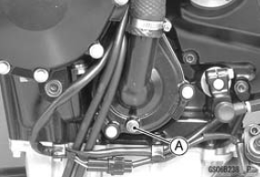
- Place a container under the drain bolt [A] of the water pump cover.
- Drain the coolant from the radiator by removing the drain bolt.
- Remove:
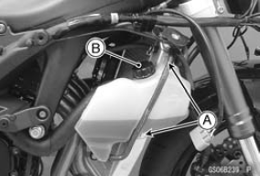
Coolant Reserve Tank Mounting Bolts [A]
Cap [B] - Pour the coolant into a container.
- Tighten:
Torque - Coolant Reserve Tank Mounting Bolts: 6.9 N·m (0.70 kgf·m, 61 in·lb) - Tighten the drain bolt with gasket.
Torque - Coolant Drain Bolt (Water Pump): 8.8 N·m (0.90 kgf·m, 78 in·lb)
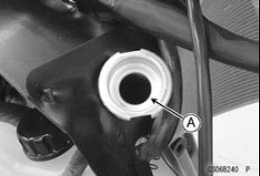
- Fill the radiator up to the radiator filler neck [A] with coolant, and install the radiator cap.
- NOTE: Pour in the coolant slowly so that it can expel the air from the engine and radiator.
- Fill the reserve tank up to the “F” level line with coolant, and install the cap (see Coolant Level Inspection).
| CAUTION |
|
Soft or distilled water must be used with the antifreeze (see below for antifreeze) in the cooling system. If hard water is used in the system, it causes scales accumulation in the water passages, and considerably reduces the efficiency of the cooling system. |
Soft Water: 50%
Coolant: 50%
Freezing Point: –35°C (–31°F)
Total Amount: 2.5 L (2.6 US qt)
- NOTE: Choose a suitable mixture ratio by referring to the coolant manufacturer’s directions.
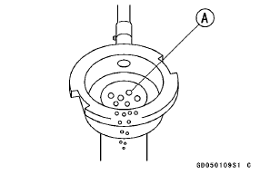
- Bleed the air from the cooling system as follows.
- Start the engine with the radiator cap removed and run it until no more air bubbles [A] can be seen in the coolant.
- Tap the radiator hoses to force any air bubbles caught inside.
- Stop the engine and add coolant up to the radiator filler neck.
- Install the radiator cap.
- Start the engine, warm it up thoroughly until the radiator fan turns on and then stop the engine.
- Check the coolant level in the reserve tank after the engine cools down.
coolant to the “F” level line (see Coolant Level Inspection).
| CAUTION |
| Do not add more coolant above the “F” level line. |